|
|
Post by TheDavii on Sept 5, 2010 19:06:43 GMT -5
Man, I could do some pretty good stuff if we had a template or something around here. Anybody good enough with photoshop to like...practically get rid of everything on a J2J card and leave on the good stuff? Did I hear someone ask for a J2J template?! You can find one here. |
|
|
|
Post by ronaldlovecraft on Sept 6, 2010 16:08:37 GMT -5
AW NEAT! THANKS A BUNCH TON, CAPTAIN!
|
|
|
|
Post by ronaldlovecraft on Sept 8, 2010 7:56:55 GMT -5
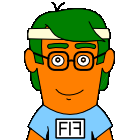
Well...here is one card I made... Keep in mind I've had Illustrator for like, a day, so if it sucks, be nice to me. Attachments:
|
|
|
|
Post by ronaldlovecraft on Sept 8, 2010 7:58:03 GMT -5
Also this... Attachments:
|
|
|
|
Post by TheDavii on Sept 8, 2010 12:49:09 GMT -5
Nice job!
It would be very nice if you would post the cards to separate threads so that we can move those threads into the J2J Fan Art Cards sub-category, without moving this whole thread there.
How easy was the template to work with?
EDIT: Also, guests cannot download attachments, so if you want "everybody" to be able to enjoy the cards, make note of that fact.
EDIT2: There is also a KinderBunnies template near the same link.
|
|
|
|
Post by zerodemon on Sept 8, 2010 14:45:58 GMT -5
Currently working on a card called THE BARNACLES!
A ship weapon which can be played on an adjacent ship. The barnacles attach to the underside of your ship and increase in strength each turn by 2 levels starting at lv2. Each round the owner of the affected ship rolls a d12 and if he fails his ship is destroyed. The barnacles will be transmitted to any ship the affected ship moves adjacent to in it's turn.
Card art is the hull of a ship with Barnacles attached. The barnacles have Barney Stinson from How I Met Your Mother's face on. Go Doogie.
|
|
|
|
Post by ronaldlovecraft on Sept 8, 2010 21:46:57 GMT -5
The template works relatively well minus the fact that it doesn't give you too much space to write text into. I mean, I'm sure you can fix that easily, but I don't know how to do it.
|
|
|
|
Post by TheDavii on Sept 9, 2010 5:43:48 GMT -5
The template works relatively well minus the fact that it doesn't give you too much space to write text into. I mean, I'm sure you can fix that easily, but I don't know how to do it. In looking at your cards, your card text needs to be much smaller to match existing J2J cards. You should be able to get four lines of text under the title. The difficulty with a template (similar to the bitmapped Quest templates) is that a person has to pick a size to make it one-size-fits-all, unlike the vector templates where that can be changed. I'll look at a number of the upcoming J2J Ultraviolet cards and see if the rule area is substantially bigger (under the premise that the rules will get more complicated in later decks, an assumption which isn't necessarily true). What do others think? |
|
|
|
Post by ronaldlovecraft on Sept 13, 2010 23:44:45 GMT -5
So when you say separate threads...what exactly do you mean by that?
|
|
|
|
Post by OMFGitsVico on Jan 28, 2011 1:34:04 GMT -5
Davii,
How are you able to make your lines in your illustrations so ... perfect? How do you go about making the outside outline thicker than the inside ones? Do you have any tips when it comes to your line art?
|
|
|
|
Post by TheDavii on Jan 28, 2011 7:09:38 GMT -5
Davii, How are you able to make your lines in your illustrations so ... perfect? How do you go about making the outside outline thicker than the inside ones? Do you have any tips when it comes to your line art? I studied the CTA cards in detail and found that they used a thick outline around most foreground objects. A number of years ago, I had the very same question. How do they do that?! I ended up asking a graphic artist friend of mine (thanks Valerie!). Like the slight-of-hand magicians use, it is a "trick." However, to do it, you have to be using a vector illustration program (e.g., Adobe Illustrator or Inkscape, which is what I use). Since I use Inkscape, I'll write in terms of its terminology. If you're using other programs, you'll have to translate. - The object(s) around which you want to have a thick outline need to be a single group. That is, group everything that comprises that object. Then make a copy of that object right on top of the original object.
- With the copy selected, set the stroke to 2 times the original outline thickness (in whichever units you're working, so if you're working in points, and your normal lines are 1.0 points, the group's outline should be set to 2 points). This will make the a 1.0 pt exterior line 1.5 pts, because the stroke is measured from the center of the line, so a 1.0 stroke is 0.5 pts inside and 0.5 pts outside. A 2.0 stroke is 1.0 inside and 1.0 outside. The inside will be hidden, but the outside will be visible, so the additional 0.5 will be added to the perceived thickness of the original line, and it will look like a 1.5pt stroke on the exterior lines only.
- I normally set the interior "fill" of the group to black too.
- At this point, you'll have a completely black blob with the shape of your foreground object and a thicker outline. Use the "order" commands to "push" the black blob object behind your original object. This will give the illusion that only the exterior lines (which are part of the black blob) are thicker. The rest of the object will still be in front, so it looks normal, with a thick outline! Presto!, you have an authentic CTA foreground object.
- If you work in layers, you can push the outline object to a separate layer. If not, you can group them so they can be moved as one object.
Others are harder. For example, the foreground object in The Djarnak is the Djarnak itself. Much harder to do this trick because it blends into the background quite well. Anyway, that's the trick. It is much easier than what I was originally trying to do, which was to make the outlines with separate strokes. I don't know if this is possible with any bitmap programs like Photoshop, so YMMV. |
|
|
|
Post by OMFGitsVico on Jan 29, 2011 22:34:28 GMT -5
YMMV? I'm taking a guess this meeeeeeans ... Your Methods Might Vary??
Anyway, yeah, I use Photoshop, but I downloaded Inkscape recently. Even though I have no idea how to use Inkscape, I feel like I understand what you described. I am wondering, though, how do you change the brush sizes in Inkscape. I'm assuming it's not so simple, since Inkscape is all about vectors?? I dunno.
Edit: I think I figured it out. I was referring to the "Freehand" line tool. I noticed the "stroke" is set to 1, and when at 0, it disappears. So the line itself is basically a stroke, I guess? Is there a way to change the automatic stroke size to something else?
Edit 2: Yeah, after playing around with Inkscape, I'm even MORE amazed at your abilities Davii. I'm losing my mind over here trying to get the hang of it. You should make a tutorial and put it on YouTube, LOL. How do you color using Inkscape?? Can I transfer my line art from Inkscape to Photoshop?? Ahh, I could ask you a million questions at this point, so I'd better just keep practicing for now.
|
|
|
|
Post by fifisdead on Jan 30, 2011 5:55:43 GMT -5
I made a tutorial for MagicCarrot.com a while back that I never finished. It isn't polished but it might be helpful to you to see the process I use to make my cards.
I worked on it a bit since I showed it to you too Glenn...
|
|
|
|
Post by TheDavii on Jan 30, 2011 9:23:00 GMT -5
YMMV? I'm taking a guess this meeeeeeans ... Your Methods Might Vary?? Your Mileage May Vary. Anyway, yeah, I use Photoshop, but I downloaded Inkscape recently. Even though I have no idea how to use Inkscape, I feel like I understand what you described. I am wondering, though, how do you change the brush sizes in Inkscape. I'm assuming it's not so simple, since Inkscape is all about vectors?? I dunno. As with most programs, Inkscape allows you to change things in multiple places. - In the lower, left-hand corner, there is an area with the labels "Fill" and "Stroke." The fill is the interior of an object, and the stroke is the outline.If you have an existing stroke, right-click on the number at the end of the swatch of color and you can easily choose a different size stroke.
- Ctrl-Shift-F will display the Fill and Stroke dialog, where you can change many attributes all at once.
- Go to the Object | Fill and Stroke menu
Edit: I think I figured it out. I was referring to the "Freehand" line tool. I noticed the "stroke" is set to 1, and when at 0, it disappears. So the line itself is basically a stroke, I guess? Is there a way to change the automatic stroke size to something else? Don't use the Freehand tool. Use the "Draw Bezier curves and Straight Lines" tool (Shift-F6). Much easier. Yes, a line will be a stroke. Rather than me explaining every feature, go to the on-line manual. Edit 2: Yeah, after playing around with Inkscape, I'm even MORE amazed at your abilities Davii. I'm losing my mind over here trying to get the hang of it. You should make a tutorial and put it on YouTube, LOL. There are already a ton of videos on how to use Inkscape. Just search for them. How do you color using Inkscape?? Color is done by filling an object with color. Any object has a outside (stroke) and an inside (fill). If you have, say, a square, fill the object by clicking on a color swatch at the bottom, using the Fill dialog, or pressing Ctrl-Shift-F to bring up the dialog. If you want to set the stroke, press Shift and click on the color swatch. Can I transfer my line art from Inkscape to Photoshop?? I don't know if the newest Photoshops can import SVG or not. However, you can export PNGs from Inkscape to Photoshop. But, what is the reason for needing to get them into Photoshop? If you're working in Inkscape, you can finish the work in Inkscape and export a finished card. |
|
|
|
Post by OMFGitsVico on Jan 31, 2011 18:03:27 GMT -5
I like coloring in Photoshop, so I figured I'd do my line art in Inkscape then transfer to Photoshop for colors.
But I clearly just need to learn how to use Inkscape instead. It's pretty tricky.
But I totally see that difference with vectors. Amazing.
|
|